How to Activate DPF Soot Level Display on a Ford Using FORScan Leave a comment
If you own a Ford diesel vehicle, being able to see the DPF (Diesel Particulate Filter) soot loading percentage in your instrument cluster or via live data can be extremelly helpful. It lets you track filter health, monitor regeneration cycles, and catch issues early before serious clogging or limp mode. In this guide, I’ll walk you step by step through how to activate the DPF soot level display using FORScan. This method works on many Ford models (especially those with AsBuilt configuration accessible) and gives you direct insight into soot levels.
⚠️ Disclaimer / Warning
Modifying AsBuilt or configuration parameters carries risk. Always back up any original data before writing changes. Mistakes can lead to module communication issues, loss of features, or instrument cluster errors. Proceed only if comfortable and with correct tools.
Why Enable DPF Soot Display?
-
You get a real-time soot loading percentage instead of guessing or relying on error codes.
-
It helps you monitor when a regen is needed before the car forces it.
-
You gain diagnostic insight into the DPF system (e.g. differential pressure, regen count).
-
Many Ford owners use this to avoid surprise DPF errors or limp mode triggers.
-
The change is reversible if you keep a backup of the original AsBuilt data.
What You’ll Need
| Item | Description / Notes |
|---|---|
| FORScan software | Use the latest stable version. Download forscan here |
| OBD2 adapter | A good-quality adapter that supports module programming (e.g. ELM327-compatible adapters, USB variants). |
| Laptop or tablet | With FORScan installed. |
| Vehicle | Ford with compatible modules (instrument cluster / IPC). |
| Patience & attention to detail | The AsBuilt strings are delicate; a single wrong digit can cause errors. |
Step-by-Step: Activate DPF Soot Level Display
✅ Step 1: Connect the Vehicle with FORScan
-
Plug the OBD2 adapter into your vehicle’s OBD-II port (usually under the dashboard).
-
Connect the adapter to your laptop (via USB, Bluetooth, or Wi-Fi, depending on your adapter).
-
Turn the ignition to the ON position (i.e. power on, but do not start the engine).
-
Open FORScan, click “Conect to vehicle”,and allow it to detect modules and establish communication.
-
Wait for FORScan to enumerate modules (IPC, PCM, etc.).
-
Ensure there are no communication errors; if there are, resolve them before proceeding.
-
TIP: Use a known working adapter and ensure all drivers are installed correctly.
✅ Step 2: Access IPC Configuration (Instrument Panel Cluster)
-
In FORScan, go to Configuration and Programming.
-
Locate and select “IPC (Instrument Panel Cluster) (As Built)” or a similarly named node.
-
Important: Back up the original AsBuilt data immediately by clicking “Save All” (or equivalent).
-
This backup allows you to restore the original settings if something goes wrong.
-
-
Wait for FORScan to read out all the AsBuilt parameters.
By backing up first, you create a safety net.Don’t skip this.
✅ Step 3: Modify the AsBuilt Setting
-
In the AsBuilt parameters list, locate the field with address
720-07-02(or the exact AsBuilt line corresponding to DPF display). -
You’ll see a string like:
(Here
xplaceholders are hex characters;*is the character you will change.) -
Change the single character
*based on this mapping rule:
-
All other
xcharacters should remain exactly the same as they were in the original. -
For instance, if the original string was
1 2 3 0 4 5 6 7 8 9 A B, and the*is digit0, change it to8, so it becomes1 2 3 8 4 5 6 7 8 9 A B(just as an illustrative example). -
Make sure you do not introduce typos or invalid hex characters.
✅ Step 4: Save and Apply Settings
-
After confirming the new value, click“Write All” (or equivalent) in FORScan to write the modified AsBuilt into the IPC module.
-
FORScan will ask for confirmation — accept and wait for the process to complete.
-
Once successful, you may be prompted to apply changes — click Yes.
-
Turn the ignition OFF, wait at least 10 seconds, and then turn the ignition back ON (but still do not start the engine yet).
-
Confirm the IPC initializes properly (gauges, indicators should move/flash).
-
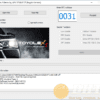
Start the engine and check whether the DPF soot level or exhaust filter display is now visible in live data or on the cluster.
Verifying & Using the New Display
-
Go into the Live Data / Datalogging section of FORScan and look for parameters like
DPF_Soot_LoadorSoot Loadunder the PCM or IPC live tables. Ford Owners Club – Ford Forums+1 -
In some vehicles, the DPF display may also appear on a productivity screen or info screen.
-
When the soot percentage increases (e.g. > 80 %), you can consider triggering a manual/static regen or monitoring drive cycles. powerstroke.org
-
Monitor that the readings make sense (e.g. they increase during heavy driving and drop after a regen).
Common Troubleshooting & Pitfalls
-
Incorrect hex character — One wrong digit can lead to invalid AsBuilt, IPC errors, or loss of cluster features.
-
Backup not made — Always keep original data so you can revert if something fails.
-
Module communication failure — If FORScan fails to write, try a different adapter or port, check voltage, and ensure stable connection.
-
No effect / no display — It might be that your cluster or software variant does not support displaying soot percentage. Some Ford models don’t allow this display depending on region/trim. Ford Owners Club – Ford Forums
-
Cluster reset or reboot — When applying, your instrument cluster may reboot; wait calmly and don’t interrupt.
-
Version mismatch / firmware lock — In rare cases, the cluster’s firmware may not allow certain AsBuilt changes.